How to Build a Poker Table
One of the most popular gambling games across the world is poker. This amazing game was earlier available at land-based casinos and poker rooms. And now it is available at online poker rooms and casinos as well. If you are into online gambling, all you have to do is sign up with one of the countless high quality online poker rooms and pick any one of the many games available to play. But nothing beats the excitement and fun of playing poker with real people at a real poker table. And if you cannot travel to a poker room you need not worry; now you can build your own poker table!
Building your own poker table is a whole lot of fun and not very difficult to do. Imagine the fun you can have once you have created your own poker table. You are free to use it whenever you want. And yeah, if you are skilled at making them you could even sell them as custom poker tables and make a living out of it, an exotic one at that! This blog walks you through the fine art and science of building your own poker table.
Why Build Your Own Poker Table
There are many reasons for you to build your own poker table. For starters, it gives you the ability to host cool poker games at your home. That means you can instantly say adios to boring weekends and not have to worry about what to do on a weekend.
Another reason to build your own table for poker is the cost. If you are thinking of buying a poker table the minimum you will have to spend is anywhere between $1500 and $2000, and that is a conservative estimate. On the other hand, the most you will have to spend in order to make your own poker table would be about $500, and that is a liberal estimate. If you plan it well, you can build one for as low as $200 or $300.
If you think building your own poker table is a time-consuming exercise, think again; it doesn’t take too much time to build your own poker table. If you go at it hammer and tongs you can get a basic table up and ready in about a day. The most you would need to spend is between 2 and 4 days, that’s it.
You do not need to make a poker table; you can play the game on your dining table as well. But that is not much fun, is it? The fun is in the experience of the game. So if you could build your own table complete with a felt top, why wouldn’t you do it? It is easy, exciting, cost-effective, and fun after all!
There is no guarantee that a poker table you buy will fit into the space you have assigned for your home poker table. Those tables come in specific sizes and you will have to check that the size matches the space you have; else it is a waste of your time and money. When you make your own poker table you can design it to your custom specifications – the look and feel, the material, the size, and more.
Making Your Own Poker Table: Materials You Will Need
The materials you will need to build your own poker table are easily available. You can categorize them into the following:
Tools
- Spade bit
- Drill
- Router
Building materials
- Wooden screws
- 2×4 wooden boards
- Washers
- Zinc lag screws
- Dense foam
- MDF
- Vinyl
- Felt
- Ply (oak veneer)
- Speed square
- 4 x 4 posts
How to Make Your Own Poker Table
Making your poker table is easy and can be achieved in a few easy steps. We list the steps out for you in an easy to read and understand format in this secstion. All you have to do is go through our blog and you will know how it is done. And if you aren’t clear, all you have to do is keep this document open and work your way through making your poker table following the instructions given here. You will be surprised with the results you get.
Step 1: Fixing the Wood – Sanding and Marking
The logical first step is to work on the base pieces. This has to be done before you start assembling them.
- Take all the base pieces and sand them thoroughly.
- On the 2 bottom platforms of 20” each and 2 top platforms of 40” each, mark the center points.
- Use a speed square to draw a line across the 4 x 4 posts from each of the center points on both sides. You must measure 1.75” in every direction prior to doing this.
Step 2: Perforate the Wood to Make Holes
The following are the steps to be followed:
- Drill 2 holes on each side of the center point between the 2 lines with a 1.5” forstner bit drill. For each piece do it on a single side.
- Take the 2 vertical legs that you have organized – each of 21” – to measure a distance of 1.75” and 3.5” from each end.
- Take these marks across the board with a speed square. For both the legs, you need to do it on the opposing sides, not the same side.
Step 3: Getting the Base Ready
Now that you have all the pieces assemble the base.
- The vertical legs are on a flat surface with the holes facing away from each other.
- The 2 middle braces are kept between the legs. The brace ends line up between the leg end and the line drawn to form a rectangle.
- Clamp the various pieces down and use a screw driver through the center of every hole; also make a mark on the brace’s two ends.
- Drill 4 to 5 inches into each of these marks, all the while keeping the drill bit straight so it is at right angles to the brace end.
Step 4: Put the Legs Together
- Fix the legs to the braces with 0.5” lag screws. Use glue and washers to do this.
- Wipe the excess glue once the joints start getting tighter.
- To the ends of the legs, attach the 2 top and bottom platform. Ensure that the 2 top braces of 2×4 are connected to the top 2 platforms.
Step 5: Marking Out the Top Platforms
- Put the 2 top braces from above across the sides of the top platforms.
- Ensure the ends of the top braces are overhanging the top platforms with a 4-inch margin on each side.
- Now, draw with a pencil along the sides of the top brace to mark the top platforms.
Step 6: Completing the Base
- Take the circular saw blade and adjust the depth to 1.75”.
- Set it out between the lines you see on the top platforms and also the 2x4s.
- The next step is to fit the braces into the top braces as planned.
- Pre-drill and attach the 2x4s to the top braces with wooden screws.
- Paint the base; you can also stain it.
Step 7: Putting Together the Support Layer for the MDF
- Take the sheet of MDF (size 0.75”) and trim it down to 42”.
- Cut the length to 88”.
- Trim the corners; then measure 12 inches back from each end. Next draw a line across the area.
- For each end, locate the center and mark out 8 inches afresh in each direction.
- From these marks, draw a line connecting back to the 12-inch line created earlier.
- Use this line as a reference to cut off the 4 corners; you can do this with a circular saw.
Step 8: Hooking Up the MDH to the Base
- Take the cut MDF and attach it to the base.
- Ensure that the MDF is overhanging each side of the brace by an inch.
- Using wood screws (1.75”), attach the MDF to the top for the base.
Step 9: Constructing the Oak Tabletop
- Use the oak plywood to put together the oak tabletop.
- Measure 14+ inches from each corner and then cut the corners after drawing a line.
- Ensure the oak plywood is at the center of the MDF.
- Use wood screws to attach the plywood and the MDF together.
Step 10: Hook the Felt Top
Follow the same process as above to hook up the felt top to the oak plywood.
- Use MDF that is 24 inches wide and 6 feet long.
- At 8 inches from each corner, draw a line; this allows you to slice the corners off.
- Next, wrap the MDF in the foam; then staple it to the board, on the underside.
- Repeat the process for the felt. Then, hook up the felt top to the oak earlier.
Step 11: Finally, Add the Rails
- You can add the rails after you have wrapped the rails in foam and vinyl.
- Once they are wrapped, clip them to the edge of the oak top.
- Use screws to drill and hold the plywood from below using screws.
Step 12: Add the Recessed Cups
- Use a pencil to trace the cup’s shape outline on the wood.
- Use the forstner bit to drill a hole each on both sides of the circle.
- Then use a router to get the shape for the recessed cups right.
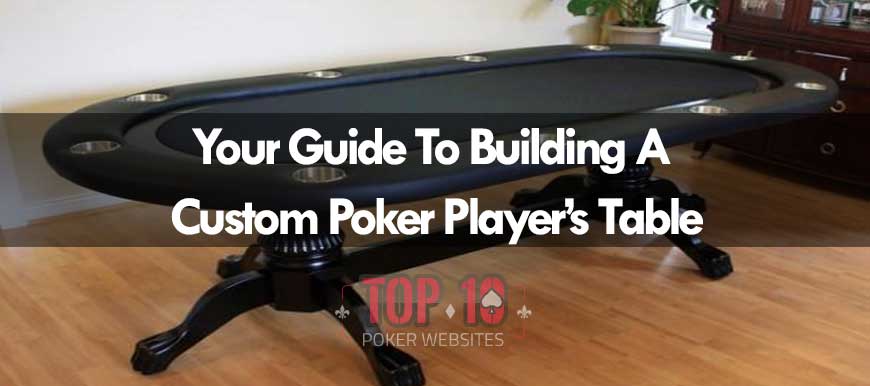
Leave the whole apparatus now to dry and fall in place. This is how you can build a custom poker table right at home.